LINKS & DOWNLOADS
- Presentation of Early Work (English)
- Research Proposal (Chinese)
- Midterm Summary (Chinese)
- Closing Presentation (Chinese)
- Thesis (Chinese)
VIDEO DEMO


Dev Milestones
- Upgrade to ROS2: 100%
- PID and Newton-Euler Dynamics in SITL: 100%
- Real hardware drivers and maiden flight: 100%
- Controller architecture and design: 100%
- Formulate MPC solver using acados: 100%
- Test MPC solver in Python: 100%
- L1-MPC python simulation: 100%
- ROS L1-MPC node: 100%
- Track trajectories and collect data: 100%
- Thesis writing: 100%
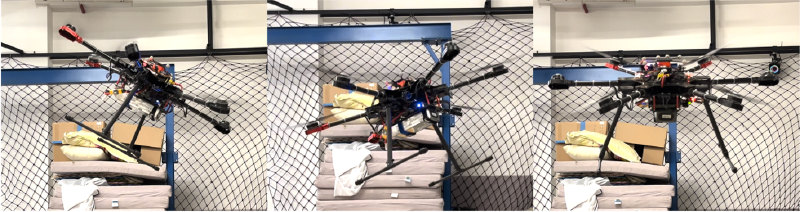
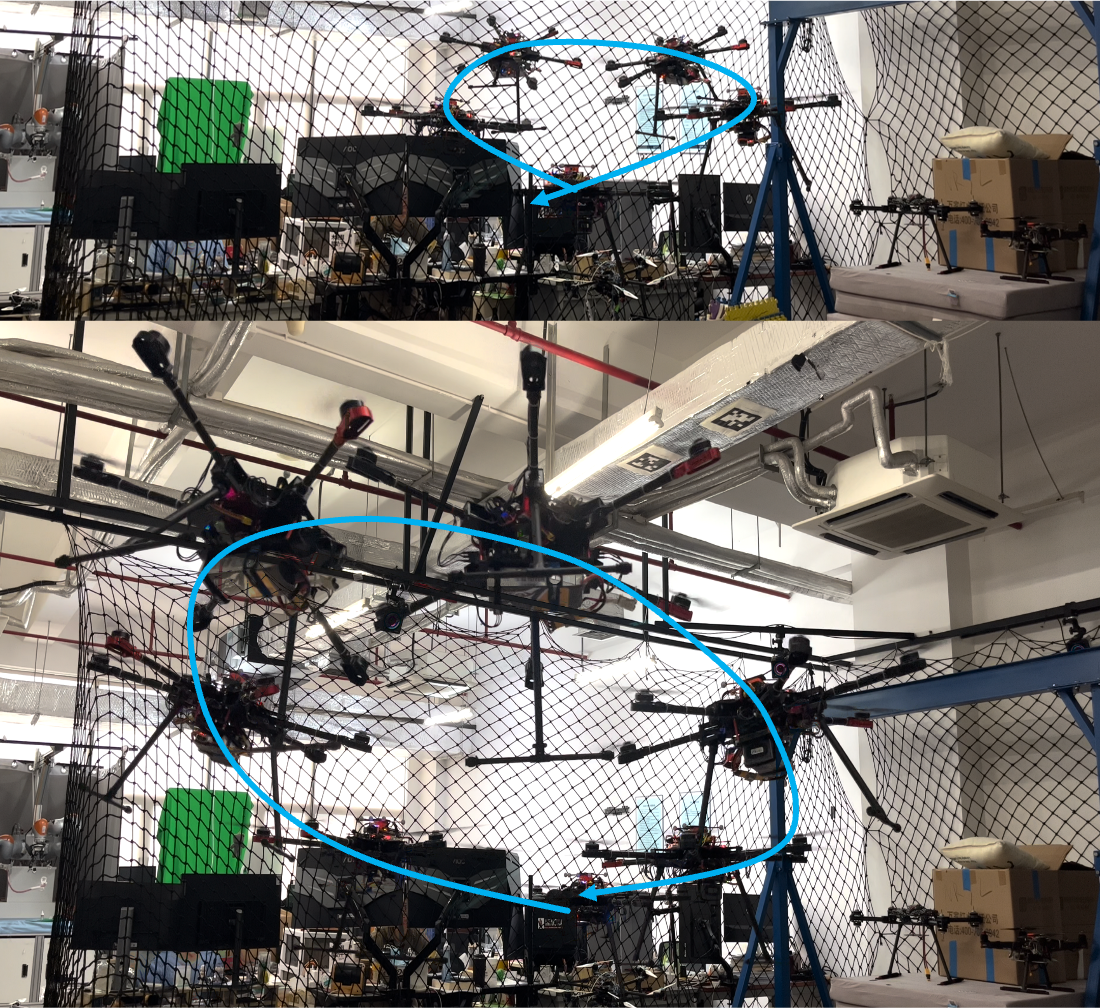
Far from perfect, but done for now (May29, 2022)
Environment Setup
Ubuntu 20.04 LTSwithROS2 foxyandROS1 noetic(since vrpn-client-ros is only available for ROS1).- Install ROS2 via debian and additional tools.
- Install Fast-RTPS-Gen using source code.
- Install Gradle v6.3 through sdkman.
- Use Gradle to build and install Fast-RTPS-Gen.
git clone --recursive https://github.com/eProsima/Fast-DDS-Gen.git -b v1.0.4 ~/Fast-RTPS-Gen \
    && cd ~/Fast-RTPS-Gen \
    && gradle assemble \
    && sudo env "PATH=$PATH" gradle install
- Install dependencies for PX4:
PX4-Autopilot/Tools/setup/ubuntu.sh. - Install officially provided ROS2 plug-ins for Gazebo:
sudo apt install ros-foxy-gazebo-ros-pkgs. - Install QgroundControl ground station.
- Install packages for optitrack:
sudo apt install ros-foxy-ros1-bridge ros-noetic-vrpn ros-noetic-vrpn-client-rosvrpn-client-rospublishes the built in message typegeometry-msgs, it is OK to use debian release ofros1-bridge.- Building
ros1-bridgeform source enables extra support for custom message and service types but has conflicts withros-foxy-controller-manager-msgs.
- Install mavros for data visualization:
sudo apt install ros-noetic-mavros* ros-noetic-mavlink. - Dynamixel-sdk
ros-foxy-dynamixel-* - Run
build_acados.shto set up the mpc code generation tool.
Usage
L1-MPC
- Models and solvers are formulated in
ros2-workspace/src/adaptive_mpc/tools/omnihex.py. - Run
acados_generate_code.shto generate solver code and do numerical simulation. - ROS2 Solver node is
ros2-workspace/src/adaptive_mpc/src/l1_mpc_main.cpp. It has to be recompiled after regenerating the solver code (where control params are defined and stored).
Simulation with Gazebo
- Build ROS2 workspace.
source /opt/ros/foxy/setup.bash
cd scripts
./build_all_ros_clean.sh
- Build and run PX4 SITL simulation. It is required to source ROS2 setup file.
source /opt/ros/foxy/setup.bash
source ./ros2-workspace/install/setup.bash
cd PX4-Autopilot
PX4_NO_FOLLOW_MODE=1 make px4_sitl_ctrlalloc gazebo_omni_hex
- Run
micrortps_agentover UDP.
source /opt/ros/foxy/setup.bash
source ./ros2-workspace/install/setup.bash
micrortps_agent -t UDP
- Use QGC to give commands to the simulation environment. Several useful buttons and modes are listed below.
- Takeoff and land
- Virtual joysticks
- Position mode, altitude mode, ACRO mode
- Or use the offboard control node to generate a trajectory for omniHex to track.
source /opt/ros/foxy/setup.bash
source ./ros2-workspace/install/setup.bash
ros2 run px4_ros_com offboard_control
Above mentioned steps are implemented in
run_simulation.sh, run this script, take off to{0, 0, 2.5}and runoffboard.shto track the 8-shape trajectory.
-
If MPC needed, then take off, use
ros2 run trajectory_generator min_ref_publisher 0 0 -2.5 1 0 0 0 0 0 0 0 0 0to generate a plain state reference, and publish/RunMpctopic to actually run the MPC. This topic is designed to be published once for a time when you need to change the flag status.TODO: use service instead
Real World Flight
-
Port connections on NUC:
- dynamixel servos on
/dev/ttyUSB0 @ 115200 - urtps_bridge on
/dev/ttyUSB1 @ 3000000-> MCUTELEM1 - QGC/mavlink on
/dev/ttyACM0 @ any baud(ACM1occurs after a reboot) -> MCUmicroUSB
- dynamixel servos on
-
About RC:
- switch A is the kill switch
- switch F sets different flight modes (up: altitude, mid: position, down: acro).
- Setup the motion capture system.
- Open motive software and open the most recent project (Z-up configuration).
- Go to capture layout (upper-right corner) and delete default rigid bodies.
- Aligned markers with the world frame and create a new rigid body from the selected ones, rename this new instance to
uav(as it is fixed inros1-workspace/src/vrpn_client/launch/default.launch). Data is automatically published to local network.
- Build PX4 firmware.
source /opt/ros/foxy/setup.bash
cd PX4-Autopilot
make cubepilot_cubeorange_ctrlalloc
- Upload firmware to MCU.
- Open QGC and navigate to “Vehicle Setup-Firmware”.
- Plug in MCU through USB (ttyACM) port and QGC will auto detect the MCU. This step requires the MCU only powered by USB.
- Select custom firmware and upload
PX4-Autopilot/build/cubepilot_cubeorange_ctrlalloc/cubepilot_cubeorange_ctrlalloc.px4. - Restart QGC so that airframe files could be loaded by QGC, then you can do further settings and calibration.
- Build ROS1 workspace.
source /opt/ros/noetic/setup.bash
cd ros1-workspace
catkin build
- Build ROS2 workspace.
source /opt/ros/foxy/setup.bash
cd scripts
./build_all_ros_clean.sh
- Start packages on NUC:
setup_real_flight.sh. This script starts the following necessary drivers.- ROS1
vrpn_client - ROS2
ros1_bridge - ROS2
micrortps_bridge,dyanmixel_driver,optitrack
- ROS1
- Now you can use packages like rqt or rviz for data monitor and visualization. Make sure to source the corresponding ROS version and workspace.
Software Version
- The original version of
PX4isstable release v1.12.3. Modified submodules derive from the commit that is referenced by PX4. - The original version of
px4_msgis commit0f550f436547fccc6b86d448e095ad914f5de94aon master branch. px4_ros_com: commitc618d757bd64113ccbee17ad0ae17ab8122337e8on master branch.
Coordinate Frame
- SDF and Solidworks models
- front-x, left-y, up-z (body)
- PX4
- NED (world)
- front-x, right-y, down-z (body)
- Gazebo
- N-Green-y, E-Red-x, U-Blue-z (world)
- Arm rotation: see Control Allocation of a Tilting Rotor Hexacopter
- In SITL, PX4 NED x is aligned with Gazebo y
- In lab setting, PX4 FRD is algined with optitrack x
SW Model to SDF
- There are several useful links
- Do NOT use SW2018SP0
- Minimize the number of links. It is good to treat parts that do not move relatively as a whole. Only separate parts into links if there must be a joint in between. Usually, a link corresponds to an assembly.
- In the assembly that represents a link, make sure to attach a coordinate frame in the SDF convention to the model. This frame will be used as the reference frame when exporting
.stland calculating mass properties. - When exporting to
.stlfiles, hide fine parts otherwise your file would be too big. Choose the aforementioned reference frame, use meter as the scale, and select “do not transform to positive space”. - Write the SDF
- SDF uses kilogram and meter as the default unit.
- Don’t use mesh as collision. Use the geometry shapes instead.
- Specify a
min_depthproperty to the collision that is in contact with the ground. - Use numbers in “Moments of inertia, taken at the center of mass and aligned with the output coordinate system”. Numbers that are not on the diagonal line of the matrix should be inverted.
sitl_gazeboplug-ins: “IMU” should be loaded after “mavlink interface”.
ROS1 Packages
mavros_client
- An overlay package for customizing the launch file. Note that this package should not be named
mavros, otherwise ROS may not find the right package path.
vrpn_client
- An overlay package for customizing the launch file.
ROS2 Packages
custom_gazebo_plugins
- This package is a supplement to officially provided ROS2 plug-ins and those provided in
PX4-Autopilot/Tool/sitl_gazebo. The official repository provides example code for writing a plug-in. gazebo_ros_arm_rotation.cppis for controlling the position of six arm joints of omniHex via thePIDAPI. Similarly,gazebo_ros_joint_pid_ctrl.cppcontrols the position of a single joint viaPID.gazebo_ros_joint_motor.cppis for controlling joint position or velocity viaSetParamandSetPositionAPI.gazebo_ros_motor_model.cppis a simplified ROS2 adaptation of the original version inPX4-Autopilot/Tool/sitl_gazebo.
px4_msgs
- This package contains message types needed by
px4_ros_comand other packages that might use the PX4 types, as well asrqtutility. - The
msgfolder is updated by the script inPX4-Autopilot/msg/tools/uorb_to_ros_msgs.py. It should be synced whenever a message definition inPX4-Autopilot/msgis changed.
px4_ros_com
-
The main purpose of this package is to generate the communication bridge
micrortps_agentfrom a template filesrc/templates/uorb_rtps_message_ids.yaml. The template file should be synced with PX4 via scriptPX4-Autopilot/msg/tools/uorb_to_ros_rtps_ids.yaml. -
There is also an example of off-board control available in
src/examples/offboard. This example code is modified to generate a full position-pose trajectory as the function of timestamps.- circle
- 8-shape
TODO: use input args or launch file to specify trajectory shape
-
It also provides useful scripts for cleaning and building the workspace.
- Previously,
build_ros2_workspace.bashis set to skipcustom_gazebo_pluginsbecause the latter depend onpx4_msgs. - It is better to add
<depend>px4_msg</depend>inpackage.xml. In this way we don’t need to specify a order. Make sure to addfind_package(px4_msgs REQUIRED)andament_target_dependencies(foo ...px4_msgs...)inCMakeLists.txt.
- Previously,
optitrack_driver
visual_odom_publisherreceives pose data from MOCAP, performs frame transformation and publishes data to topicVehicleVisualOdometry_PubSubTopic. In this target, the message is published in a timer callback at 50Hz.- Timestamps are taken from
VehicleImu_PubSubTopic. callback_relayis a simple relay. It is similar tovisual_odom_publisherbut instead of publishing data in a timer callback, it publishes data in the callback for receiving pose data.
dynamixel_driver
read_write_nodeis the example node provided bydynamixel_sdk.arm_position_controlis the one used for controlling the arm positions. It communicates with dynamixel servos via UART in the callback function for receivingArmRotation_PubSubTopic.
trajectory_generator
- A package for generating trajectories in MPC framework and visualizing
TrajectorySetpoint_PubSubTopic. - Visualization is implemented in
rviz_translator.cpp
adaptive_mpc
-
Input topic:
/StateReferenceOcp, horizon 1s, 20 + 1 nodes -
Outputs wrench setpoint
-
Switches and flags:
/RunMpc: should be published once every time you wish to change the status ofrun_mpc_. It is switched to false if a solver reset has occurred.
PX4 Tools and Miscellaneous
- Set the correct URL in
.gitmodules. - Custom models for Gazebo simulation is put in
PX4-Autopilot/Tools/sitl_gazebo/modelswith a corresponding.worldfile inPX4-Autopilot/Tools/sitl_gazebo/worlds.- The initial condition of the simulation could be set in
PX4-Autopilot/Tools/sitl_run.sh. - Some plug-ins are built externally (in the ROS2 workspace). So
PX4-Autopilot/Tools/setup_gazebo.bashis modified to export the correct library paths.
- The initial condition of the simulation could be set in
- As we are using the
micrortps_bridge, we need to build this module in PX4. We can specify this feature by uncommenting themicrortps_bridgeline inPX4-Autopilot/boards/px4/sitl/ctrlalloc.cmake, which is the module configuration file for SITL targets. We can choose what modules to be built and what not to be built. The same rule applies to.cmakefiles for other boards. - Add our custom model for gazebo simulation in
PX4-Autopilot/platforms/posix/cmake/sitl_target.cmake. - Add our airframe file (a model-dependent script for loading parameters and modules) for simulation in
PX4-Autopilot/ROMFS/init.d-posix/airframesand make sure to add this file to theCMakeLists.txt. - The airframe for real hardware is
init.d/airframes/6004_omni_hex. - A new mixer is in use:
omnihex.main.mix. mc_rate_controlisn’t started inrc.mc_appsifMIXER = omnihex
PX4 Messages
- Add a message to hold arm positions and limit status:
arm_rotation.msg. After adding a new message file, don’t forget to indicate it inCmakeList.txt, otherwise it won’t be compiled. - Every message should be assigned an ID in
msg/tools/urob_rtps_message_ids.yamlor targets withmicrortps_bridgeenabled cannot be compiled. Also, we can specify howmicrortps_bridgetreat each message. vehicle_attitude_setpoint.msgandvehicle_local_position_setpoint.msgare modified to handle roll and pitch movements.
PX4 Modules
- Generally, a good way to read the code is to look at the header files first. Look at topic subscriptions and publications. Then look at the
run()function in.cppfiles. - Modified modules are
angular_velocity_controller,commander,control_allocator,flight_mode_manager,mc_att_controlandmc_pos_control.
angular_velocity_controller
-
Center of mass compensation $x_{com} \cross F_{sp}$ in
AngularVelocityControl.cpp/hpp,void AngularVelocityControl::update(). -
Read center of mass parameters and call
AngularVelocityControl::update()with additional arguments inAngularVelocityController.cpp/hpp. -
Newton-Euler equation cross term $\omega_b \cross v_b$ in
void AngularVelocityController::Run(). -
Center of mass parameters are defined in
vehicle_model_params.c.
commander
- In
void Commander::update_control_mode(), ACRO mode is added with the same set of configuration as POSCTL mode.
control_allocator
- The allocation matrix (actuator effectiveness) is implemented as a subclass of
ControlAllocationPseudoInverseandModuleParams. SeeActuatorEffectivenessOmniHex.cpp/hpp/params.cfor more detail. In PX4 convention, torque comes above force in a wrench. - Add omniHex to enum classes, switch cases, and includes in
ControlAllocator.cpp/hpp. - Publish control signals to
actuator_controls_0instead ofactuator_controls_4, withactuator_controls_0[3]reserved for total thrust signal. - Always check
CMakeLists.txt
flight_mode_manager
-
This module takes care of controller setpoints in different flight modes.
-
Switch to
FlightTaskIndex::ManualAccelerationwhen invehicle_status_s::NAVIGATION_STATE_ACRO. This feature is implemented inFlightModeManager.cpp.TODO: exclusive flight task for ACRO mode (not only pitch but full pose)
-
FlightTask.cpp/hpp: add missing variables and functions that are not implemented for roll and pitch commands. -
FlightTaskManualAltitude.hpp: add scaling factors from stick to roll and pitch rate. -
FlightTaskManualAcceleration.cpp/hpp: generate different setpoints in different navigation states. -
Set roll pitch angle and angular speed setpoint in
FlightTaskFoo::activate()function of tasks such asAuto,FailsafeandManualAltitudeSmoothVel. This is necessary because otherwise the vehicle loses roll and pitch control when auto buttons in QGC is pressed.
mc_att_control
AttitudeControl.cpp:matrix::Vector3f AttitudeControl::update()is modified to consider turning rate feed-forward.AttitudeControl.hpp: add roll and pitch invoid setAttitudeSetpoint(), also variables.mc_att_control_main.cppandmc_att_control.hpp: call modified function with the right arguments.
mc_pos_control
PositionControl.cpp/hpp: add variables to take care of roll and pitch rotation. Invoid PositionControl::getAttitudeSetpoint()attitude setpoints are passed down and thrust setpoint is converted into body frame.mc_pos_control_params.c: define parameters for manual roll and pitch rate control, which are used inFlightTaskManualAltitude.hpp.MulticopterPositionControl.cpp/hpp: call modified functions and pass correct arguments.
EKF2
- In
PublishAttitude, an extra step of converting and publishing RPY is added.
mixer & px4io
-
AllocatedActuatorMixer.cppnow listens toactuator_controls_0instead ofactuator_controls_4. -
ESC calibration parts in
px4io.cppandmixer_module.cppare modified forcontrol[0]tocontrol[6], exceptcontrol[3].TODO: test calibration function, make sure props are removed
Motor-Propeller Model
SITL
- In
gazebo_motor_modelandomni_hex.sdfmotorConstant = thrustCoef = 8.5e-06torqueCoef = thrustCoef * momentConstant = 8.5e-06 * 0.06
- In
px4- The thrust coefficient if defined as
Thrust = CT * u^2, where u (with value between CA_ACT0_MIN and CA_ACT0_MAX) is the output signal sent to the motor controller.CT = 19.125 - The moment coefficient is defined as Torque = KM * Thrust (is consistent with momentConstant).
KM = 0.06
- The thrust coefficient if defined as
- From u (PX4) to $\omega$(real rotor angular velocity)
PWM = 1000 * (1 + u)(observation from print-debugging), whereu = actuator_setpoint[0, 1]omega = (u + offset) * scaling + idle@(line ~1121 mavlink interface plugin), in sdfoffset = 0; scaling = 1500; idle = 100
- Conversion between
CT(PX4) andmotor constant(thrust coef, paper, plugin), we assume that the idle value is negligableCT = scaling^2 * motorConstant
Real World Data
TODO: mapping between PWM and angular velocity, determine thrust and torque coefficient
x = actuator_setpoint[0, 1]toy = actuator_controls_0[-1, 1]: $y=2x-1$x = actuator_controls_0[-1, 1]toy = PWM[min, max]: $y=\frac{x(y_{max}-y_{min})}{2}+\frac{y_{max}+y_{min}}{2}$x = PWM[min, max]&y = relative_thrust[0, 1]: $ay^2+(1-a)y-x=0$, where $a\in[0.25,0.35]$
Matlab Files
- In
matlab-workspace. trajectory.m: visualization of 8-shape trajectory.